Amplium Workflow

Workflow
In this article, we will share the encoding workflow used on the Amplium platform.
TL;DR
-
Export a Vision Pro Bundle from DaVinci Resolve with the following settings:
- Video: 4320x4320, full color range
- Audio:
.mp4in APAC format
-
Use Amplium Mac to split the Immersive ProRes video exported from the Bundle into separate left-eye and right-eye videos.
-
Use Topaz Video AI to upscale the left-eye and right-eye videos to 7200x7200 with the Iris model.
-
Use Amplium Mac to encode the final result into an
.aivufile.
Requirements
- macOS 26.0 or later
- DaVinci Resolve
- Topaz Video AI
- Amplium Mac
Exporting from DaVinci Resolve
This is probably the most familiar step for many creators.
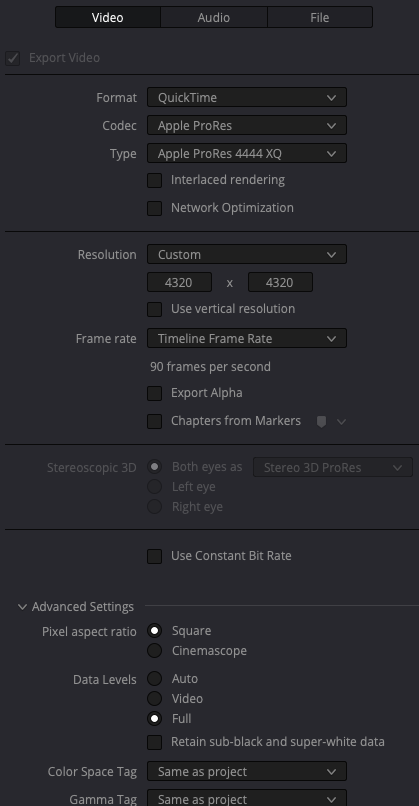
For the export preset, choose Vision Pro Bundle.

In the video settings, select ProRes 4444 XQ, 4320x4320, and Data Levels: Full.
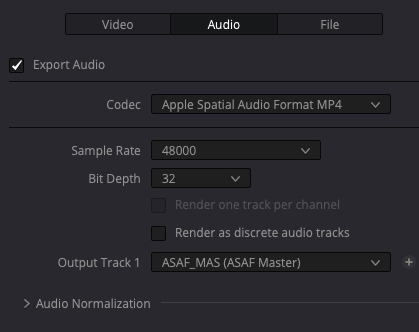
For audio, select Apple Spatial Audio Format MP4.
After the settings are ready, start rendering and export the following files locally:
- Immersive ProRes video
- APAC
.mp4audio file .aimefile
Exporting the Left and Right Eye Videos with Amplium Mac
To upscale the video in Topaz Video AI, you need to have the left-eye and right-eye videos as separate files.
Open Amplium Mac, go to the Decoder menu, and select the Immersive ProRes video exported in the previous step. Then click the Export Eyes button. This will export the left-eye and right-eye videos locally as separate files.

One important note: the exported eye videos will have roughly the same file size as the original ProRes file. In the next Topaz Video AI step, even larger files will be generated. Make sure you have plenty of free disk space before continuing.
Upscaling with Topaz Video AI
At this point, you should have local 4320x4320 videos for both the left eye and the right eye. Import both files into Topaz Video AI.
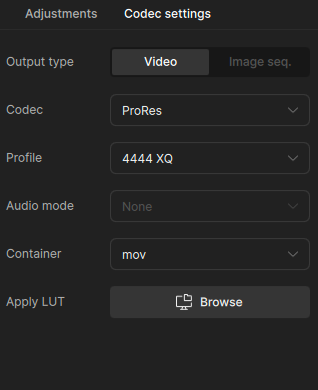
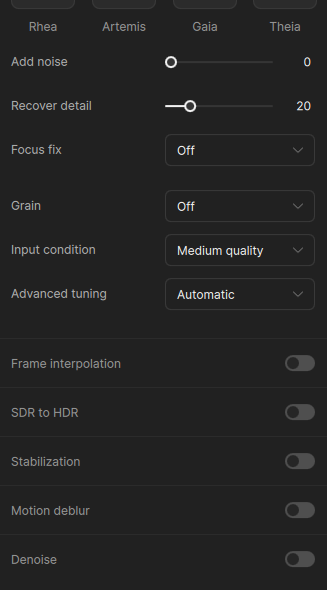
First, set Codec Settings to ProRes 4444 XQ.
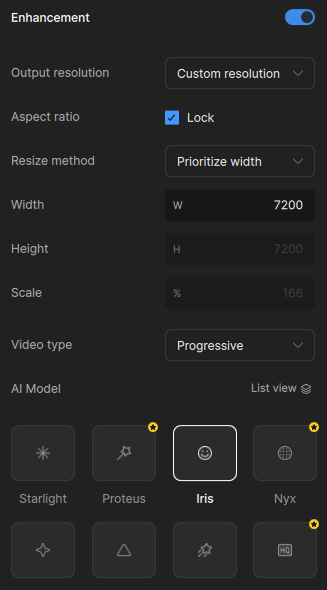
Next, in the upscale settings, set the output resolution to 7200x7200 and choose Iris as the AI model.
You can adjust the model depending on the characteristics of the video. For example, if the video is dark and you want to reduce overall noise rather than focus mainly on facial details, Nyx can also be a good option.
Once the settings are ready, export the videos.
Encoding with Amplium Mac
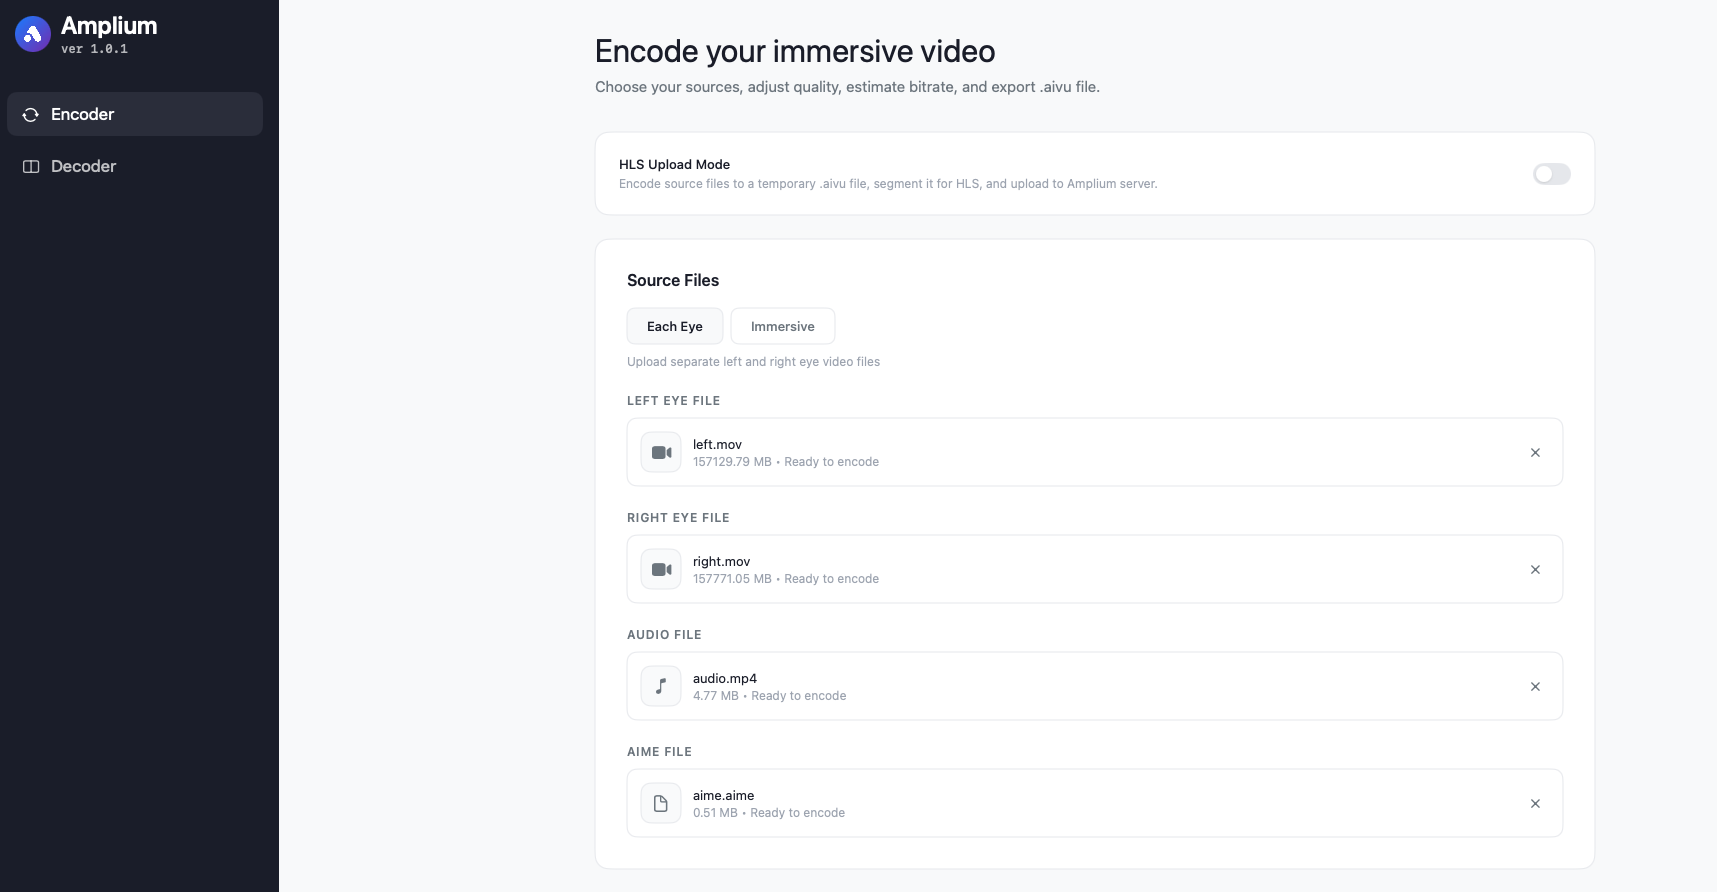
The final step is encoding with Amplium Mac.
First, import the left-eye and right-eye videos that were upscaled in Topaz Video AI.
Next, import the audio file and the .aime file exported from DaVinci Resolve.
Then adjust the Encoding Settings. The recommended setting is the default Software encoding mode with CRF 16.
A lower CRF value gives higher quality and a higher bitrate. For the resolution, choose 4320x4320, which is the standard resolution for .aivu.
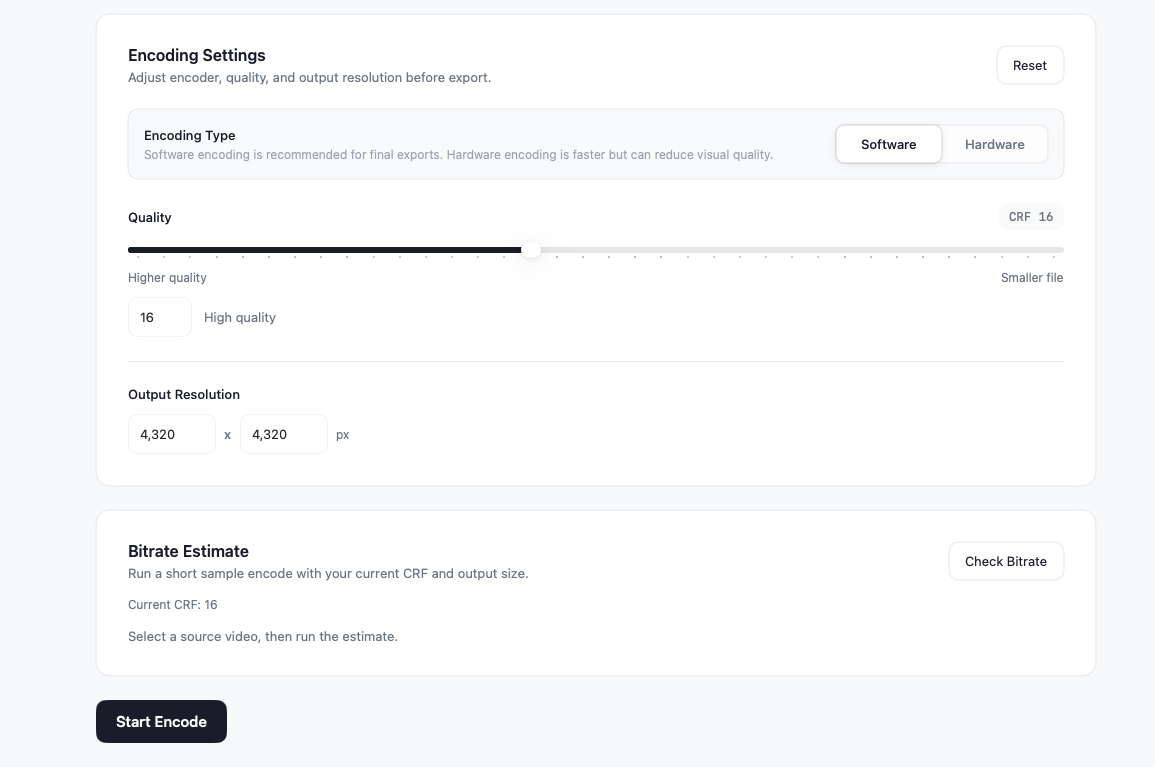
Click the Start Encode button to begin encoding. When the process is complete, the final file will be exported locally.